
How I Publish This Site
Building and Deploying a Hugo Site to Github Pages
Hugo is a static site generator akin to Jekyll but built on Go. Pages (or in my case, blog posts) are written in Markdown, which is second nature to me. And all the page partials are written using Go Templates, which are straight forward and easy to work with.
I store the site’s source in one public repo, and then host it from another (using Github Pages). And to do that automatically I use Github Actions. All these things were familiar topics, but didn’t have firsthand experience with any of the specific technologies. So get to learn 4 things in one go! (Go, Hugo, Github Pages, and Github Actions)
It’d be the dream hobby project if I only had the need for another website. So… I guess a blog it is. I took on this project in 2018 and, seeing as this is my 16th post, so you can tell how naturally I take to blogging.
Hosting on Github Pages
I have lots of existing ways to host a site but this whole project was about exploring something new which lead me to look at what was trendy. In 2018 Github Pages was still fairly new and free is a good price for hosting. Plus this is a personal project so F-U diligence, let’s make a rash decision!
Github Actions
But Hugo sites need to be built, uploading files is tedious, and I am a very lazy person. See also, my post history. Enter Github Actions to make all this happen for me.
Actions can be attached to any repo, so I added the following to my source repo. I found a ready made action (by charbad360) for this, so I get to learn and be lazy. This really is the perfect project!
Looking at the repo for that action, it does all what I would do only I didn’t have to do it and there’s a lot of support for things I might want to utilize later. TL;DR: The dockerfile copies and executes a shell script on an Ubuntu container. Said shell script installs Hugo, builds the site, and commits it to my pages repo.
Setting up the action
The first part of the Github Action sets up a listener on the main branch of my source repo (the one that this action is set up on).
name: Publish to Github Pages

# Controls when the action will run.
on:
  push:
    branches: [ main ]

    # Allows you to run this workflow manually from the Actions tab
  workflow_dispatch:
Launch a single job
From there we need a single job with 2 steps (3 if you count outputting a done message). This is where I define that the job will run on Ubuntu (latest) and what steps will be run.
In the second of those steps the build process kicks off via the hugo-gh-pages action. It takes some parameters which are set under the with: key. You can see all the parameters on the
marketplace page.
jobs:
  build-deploy:
    runs-on: ubuntu-latest

    steps:
      - name: Checkout Repo
        uses: actions/checkout@master
        with:
          submodules: true
      - name: Publish Site
        uses: chabad360/hugo-gh-pages@master
        with:
          githubToken: ${{ secrets.PAT }}
          repo: Bishma/Bishma.github.io
          args: --gc --minify
          branch: main
      - name: Output
        run: echo Site Published
Personal Access Token
This is where I have to fess up. The reason I’m finally publishing this blog entry, 4+ years after starting the it, is that I keep forgetting this step. This whole post is documentation for me to refer to every year when my [Github Personal Access Token] expires.
 The
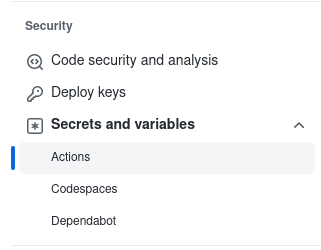
The githubToken key above is assigned a variable stored in the repo’s settings under Actions. In there I created a variable named PAT (short for Personal Access Token). This is a fine-grained access token set in my account’s settings. From setting go to <> Developer settings (down at the bottom). Then Personal Access Tokens, then Fine-grained Tokens.
I generate a token that can only access my Bishma/Bishma/github.io Pages repo and I give it a single permission. Under ‘Repository Permissions’ I grant Read and Write to the ‘Actions’ permission. This will allow my action to push the freshly built pages into the repo. And I give it the maximum lifetime, which is currently 1 year. This is why I’ll need to reread this blog post about once a year. I suspect I’ll find a decreasing number of typos every anniversary for at least 4 years.
I generate the token and then paste it into the PAT variable I made back under blog settings.
That’s it, things are getting publish now every time I do a push back to the main branch.
Domain
The only thing left is adding a personal domain. I have a DNS through Dreamhost so I just needed to follow github instructions on setting up a custom domain and I was in business.
And that’s how you set up a blog. Certainly the easiest approach to blogging anyone can imagine.